Shut off power, plan your runs, mount fixtures, pull cable, connect, and test.
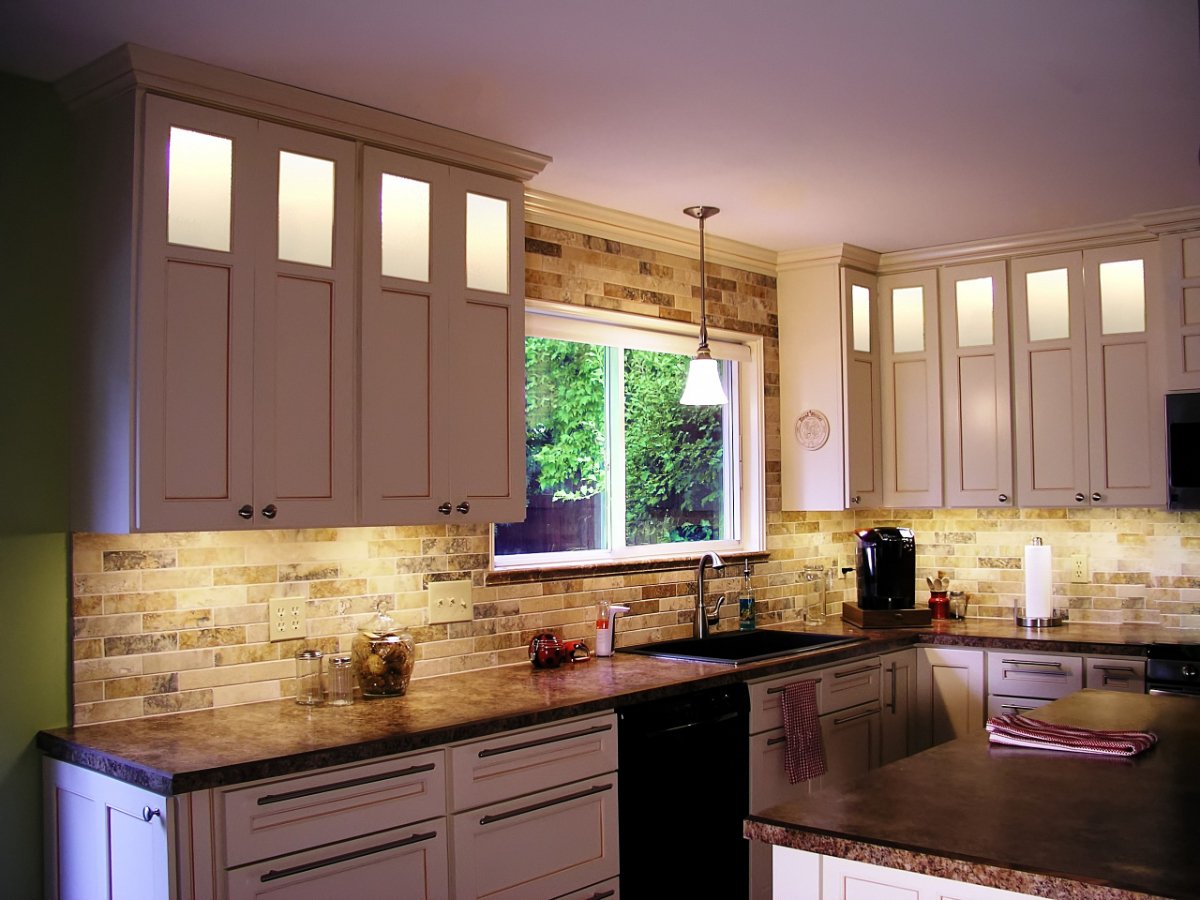
If you want a clean, built-in look with bright, even light, you’re in the right place. In this guide, I’ll show you how to hardwire under cabinet lighting the safe, pro-approved way. I’ve installed dozens of systems in real kitchens, and I’ll share clear steps, smart layouts, and fix-it tips so you can do it once and do it right.
What Hardwiring Under-Cabinet Lighting Means (And Why It’s Worth It)
Hardwiring ties your lights into your home’s electrical system. No cords on the counter. One wall switch or dimmer controls it all. It looks custom and boosts resale appeal.
Here is what you gain:
- Clean lines and no visible plugs or extra outlets.
- Reliable power and smooth dimming with the right setup.
- Safer wiring with proper junction boxes and strain relief.
Here is what to watch:
- You will patch small holes from cable runs.
- You must follow electrical codes and use listed parts.
- Plan before you cut, drill, or fish any cable.
If you are wondering how to hardwire under cabinet lighting for a long-lasting result, think through layout, driver type, dimming, and code checks before you start.
Plan Your Layout Like a Pro
Good planning makes the install fast and clean. Here is how I map projects on day one.
- Measure each cabinet run. Note sink, stove, and range hood spots.
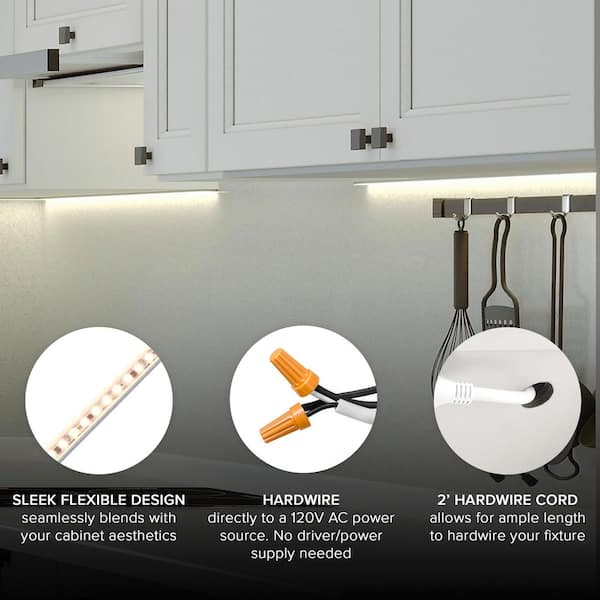
- Pick fixture type. LED bars give even light. Pucks give pools of light. LED tape hides well and works for long runs.
- Choose color and quality. 2700K is warm. 3000K is warm-white. Aim for 90+ CRI so food looks great.
- Decide low voltage or line voltage. Low voltage uses a driver. Line voltage bars have built-in drivers.
- Pick the switch. Use a dimmer listed for LED and for your driver type.
- Plan cable paths. Drill at the back corner of cabinets. Hide wires behind face frames or in shallow channels.
- Sketch your wiring. Daisy chain or run each light back to one junction box.
- Check where you will get power. Use a lighting circuit, a nearby switch box, or add a new feed if needed.
This prep is the backbone of how to hardwire under cabinet lighting without mess or surprises.

Tools and Materials You’ll Need
Gather everything before you start. You will save time and avoid return trips.
Tools:
- Non-contact voltage tester and a multimeter
- Drill, driver, and bits including a spade or Forstner bit
- Fish tape or glow rods
- Wire strippers and a screwdriver set
- Cable staples and clamps
- Stud finder and tape measure
- Safety glasses and dust mask
Materials:
- LED bars, pucks, or tape with channels and lenses
- If low voltage: a listed Class 2 LED driver
- If line voltage: hardwire-ready fixtures
- NM-B cable sized for the circuit, often 14/2 on 15A or 12/2 on 20A
- Low-voltage cable if using a remote driver
- Approved junction boxes with covers
- Wire connectors, bonding pigtails, and labels
- A compatible LED dimmer switch
Keep parts from the same brand when you can. It reduces flicker and dimming issues, and it simplifies how to hardwire under cabinet lighting with fewer variables.

Safety And Code Checks That Matter
I treat every kitchen like my own home. Safety first, always.
- Turn off the breaker. Lock it out if possible. Verify power is off with a tester.
- Use listed junction boxes. Keep them accessible. Do not bury them behind drywall.
- Support cable and protect it. Use clamps, grommets, and staples at proper spacing.
- Keep neutrals intact in switch boxes. Switch the hot only.
- Kitchens often require AFCI protection. Some areas also ask for GFCI protection for lighting near wet zones. Check your local code.
- Match dimmer and driver type. For example, ELV dimmer for an ELV driver.
- Do not overload the circuit. Add up watts or VA and check against the breaker and wire size.
If you feel unsure about any step, call a licensed electrician. There is no shame in getting help, and it is part of smart planning for how to hardwire under cabinet lighting.
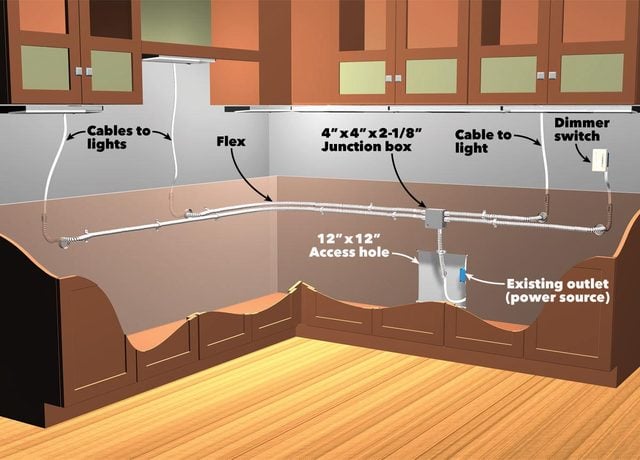
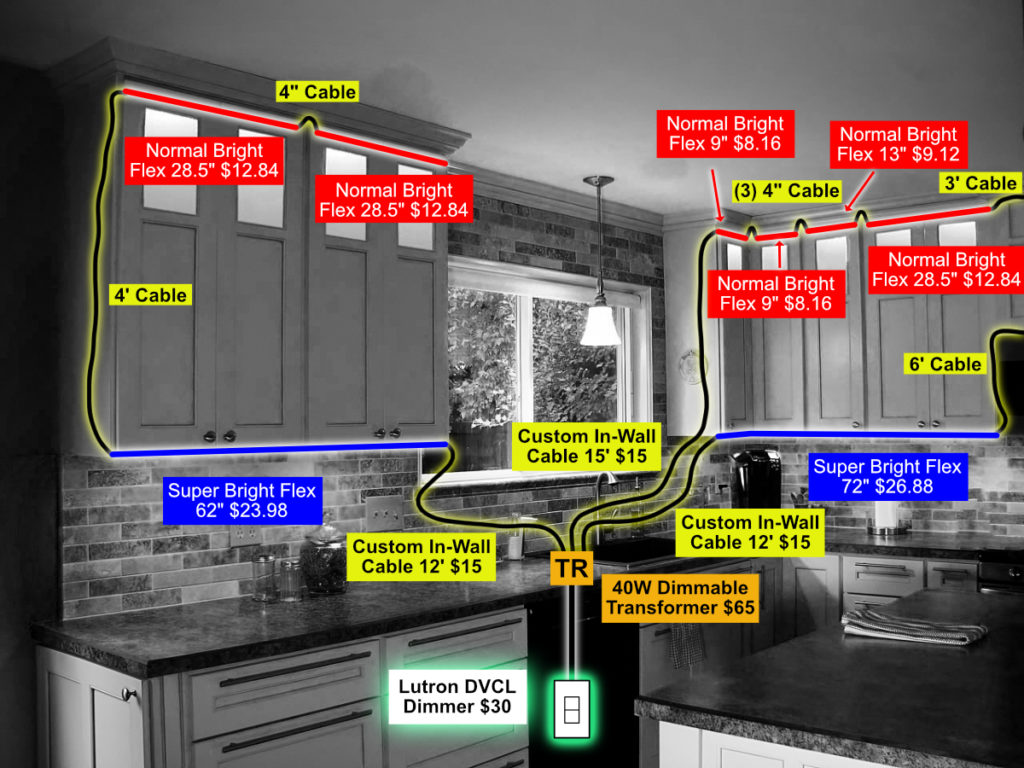
Wiring Options And Simple Diagrams In Words
Most projects fall into two clear paths.
- Line-voltage bars with built-in drivers. Power goes from breaker to switch to a junction box, then daisy chains to each bar. Hot to hot, neutral to neutral, ground to ground.
- Low-voltage LED tape or bars with a remote driver. Line voltage feeds the driver in a junction box. Low-voltage wires run from the driver to fixtures. Keep polarity correct: positive to positive and negative to negative.
You can wire:
- One homerun feeding a central junction box, then out to each light.
- A daisy chain where each light has an in and an out.
- Multiple drivers if one run is very long, to control voltage drop and ensure even brightness.
Understanding these options is key to how to hardwire under cabinet lighting without dim spots or flicker.
Step-By-Step: How To Hardwire Under Cabinet Lighting
Follow these steps for a clean, code-friendly install.
-
Kill power and confirm it is off at the source with a tester.
-
Mark fixture locations. Center bars 1 to 2 inches from the front face frame for even counter wash.
-
Dry-fit lights. Check door clearances and valances. Confirm lens direction.
-
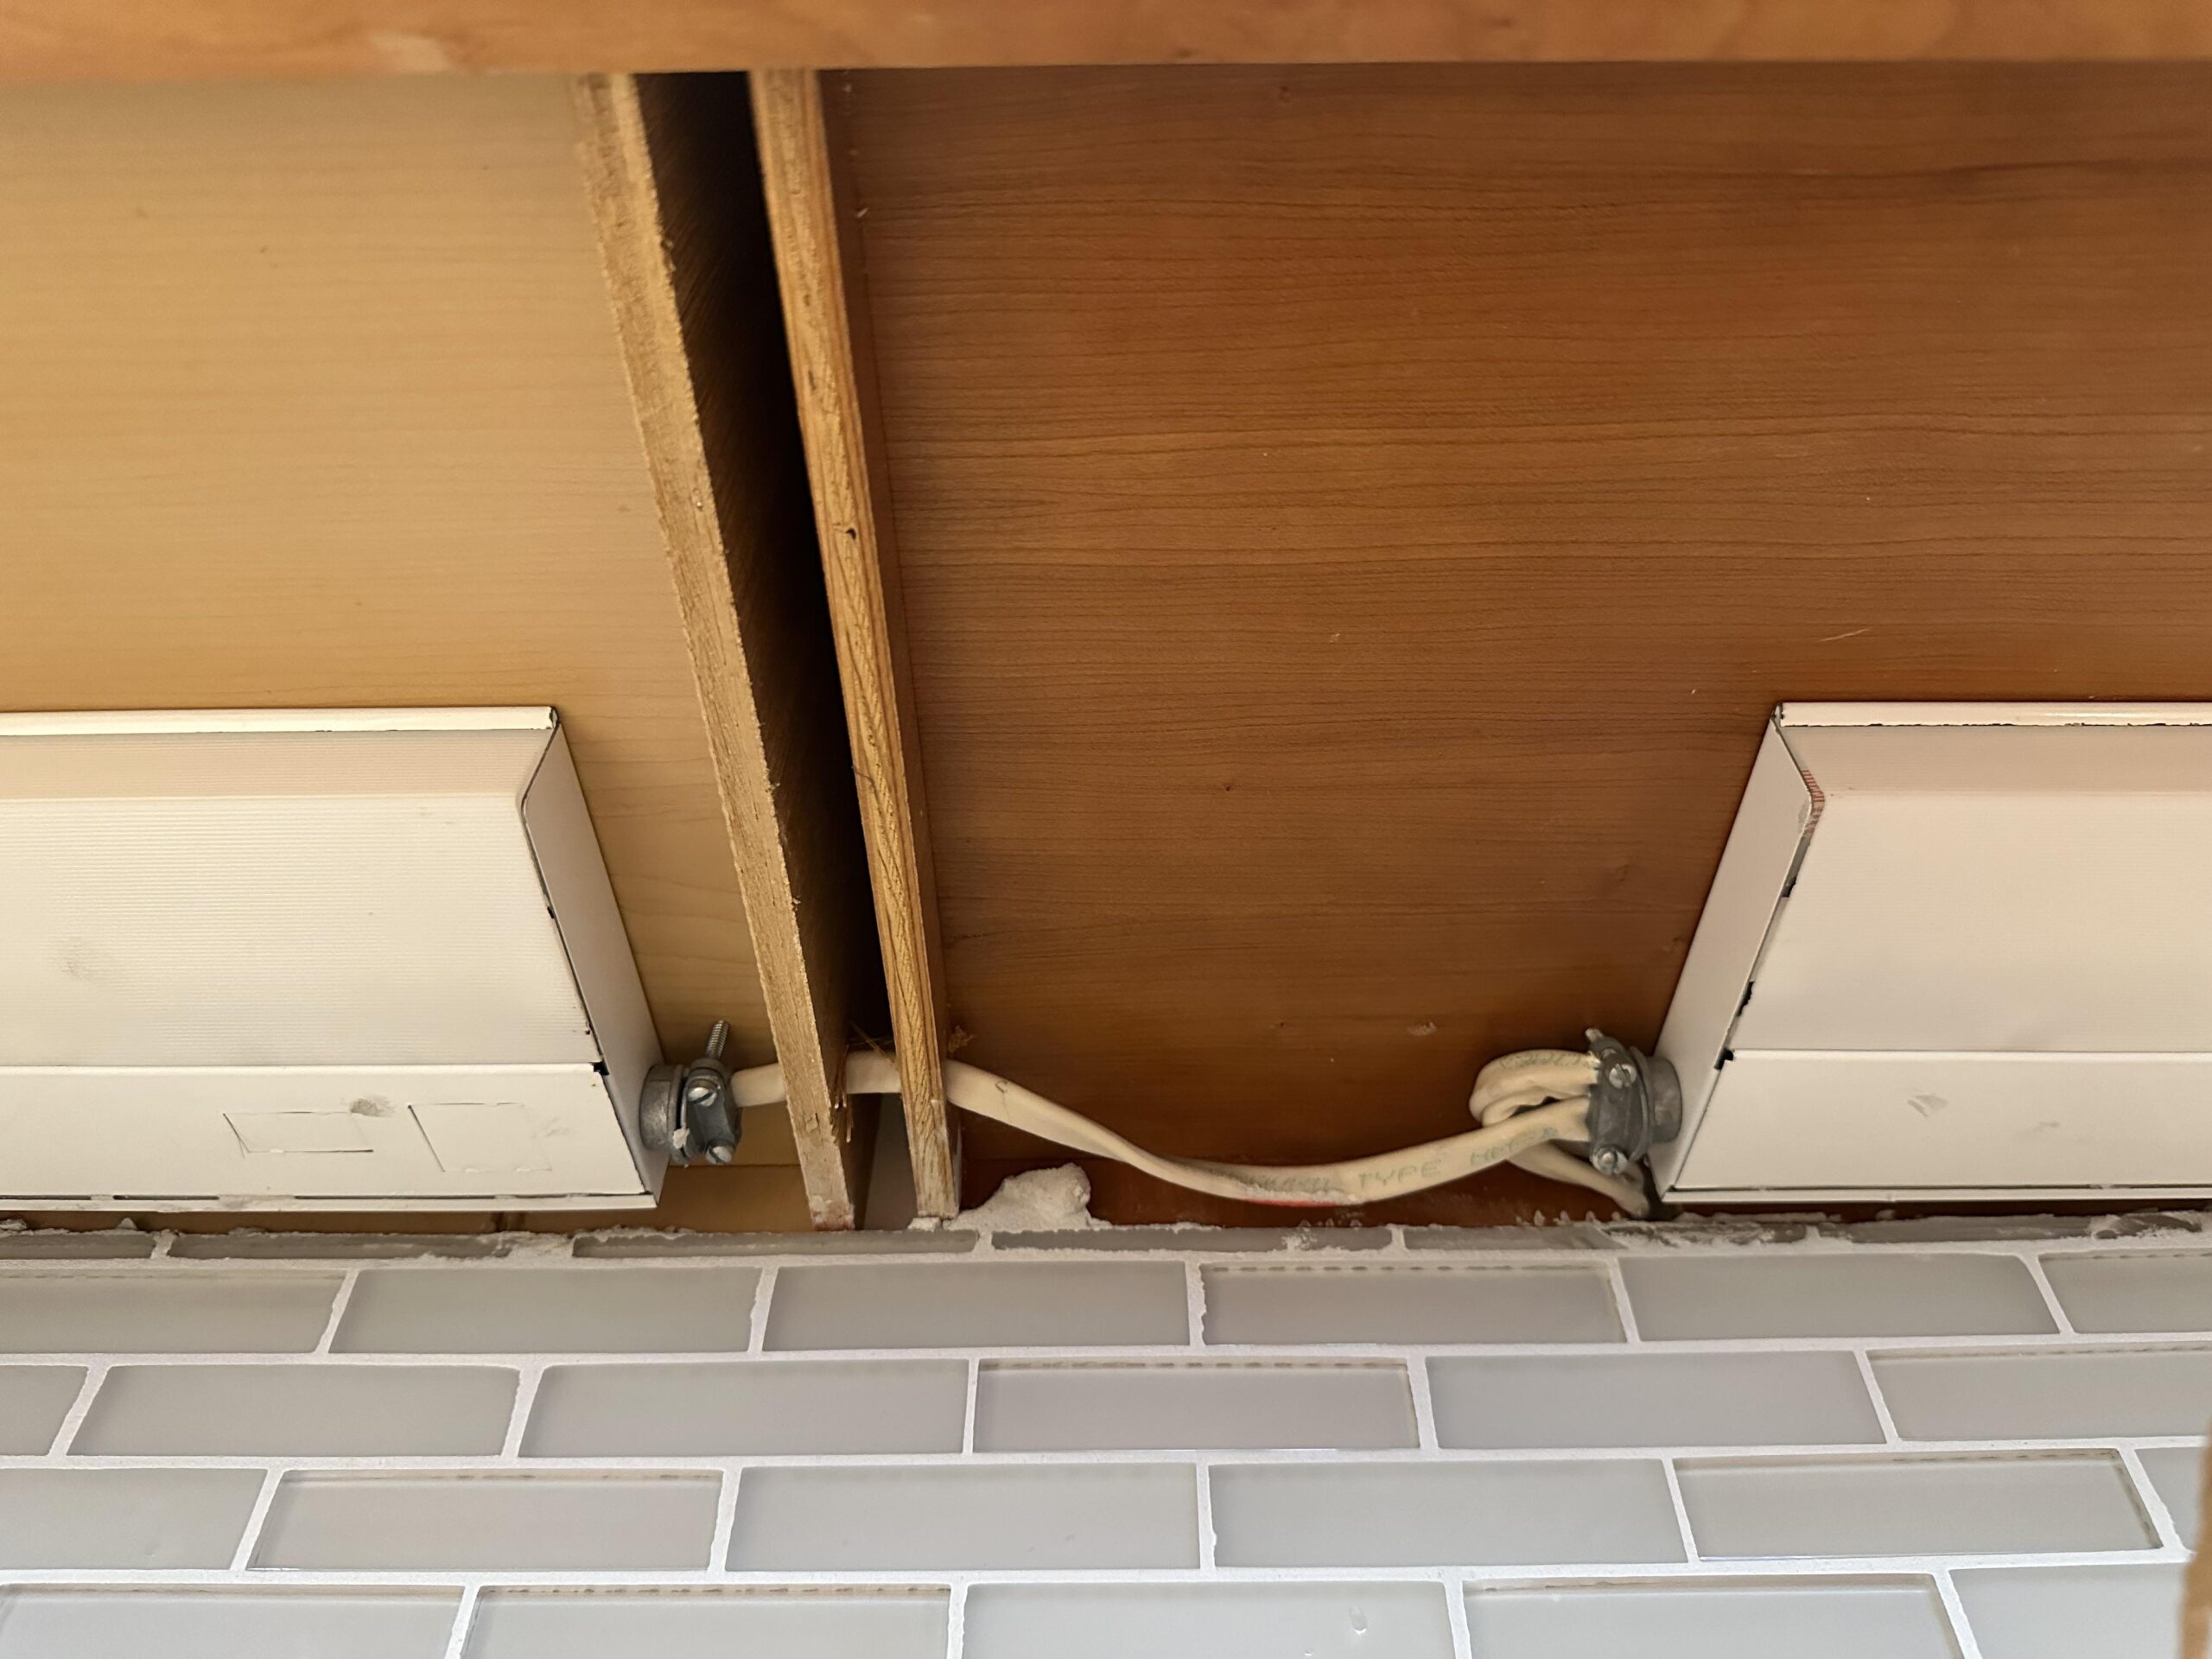
Drill wire pass-through holes at the back corner of cabinets. Keep holes neat and use grommets if needed.
-
Mount junction boxes. Place them inside a base cabinet, in a pantry, or high on a wall. Keep covers accessible.
-
Run NM-B cable from the power source or switch box to your junction box. Follow support and protection rules.
-
If low voltage, mount the Class 2 driver near the junction box. Leave room for cooling. Do not stuff it in a dead space.
-
Pull cables to each fixture location. Label each run. It helps during final connections.
-
Make switch connections. Hot feed to switch common. Switched hot back to the junction box load. Keep neutral spliced through. Bond grounds.
-
Strip and join wires with listed connectors. Keep color codes consistent. Tuck neatly to avoid strain.
-
For low voltage, connect driver output to the light leads. Mind polarity. Keep low-voltage runs as short as possible to reduce drop.
-
Mount lights per the manual. Use all screws provided, not tape alone, unless the system is rated for adhesive-only.
-
Install the dimmer. Use a model listed for your lights. Set the trim adjuster to stop low-end flicker.
-
Restore power and test. Check each light, color, and dimming range. Wiggle-test connections for stability.
-
Finish work. Add covers, label the circuit, and patch any small wall holes. Clean lenses and counters.
This process is the heart of how to hardwire under cabinet lighting. Take your time on each step for a clean result.

Dimming, Drivers, And Smart Control
Dimming makes under-cabinet lights way more useful. You can set bright task light for chopping, then drop to a glow for late snacks.
- Match dimmer and driver. ELV dimmers pair with many modern LED drivers. Older magnetic drivers may need MLV dimmers.
- Consider 0–10V or smart drivers for ultra-smooth dimming. Some fixtures accept smart switches and work with voice control.
- Set the low-end trim on the dimmer. This avoids shimmer at the bottom of the range.
- If you split long runs across two drivers, keep them on the same dimmer so brightness matches.
If you want easy control later, plan that now. It is part of how to hardwire under cabinet lighting that stays flexible as tech changes.

Troubleshooting And Quick Fixes
Most issues trace back to one of a few causes.
- Flicker or shimmer. Often a dimmer-driver mismatch. Swap to a listed dimmer or change the driver type.
- One section is dim. Check polarity on low-voltage leads and look for a loose splice.
- Color shift along the tape. You may have voltage drop. Use a thicker gauge low-voltage cable, shorter runs, or feed both ends.
- Shadows at the backsplash. Slide bars toward the front edge or add a small light valance.
- Buzzing dimmer. Try an ELV dimmer and ensure the load meets the dimmer’s range.
Learning how to hardwire under cabinet lighting includes learning how to diagnose small glitches fast.
Maintenance And Smart Upgrades
LEDs last for years, but a little care goes a long way.
- Dust lenses and wipe with a soft cloth. Do not spray cleaner into housings.
- Keep driver areas clear so they can breathe.
- If a driver fails, replace like-for-like with the same voltage and watt rating.
- Upgrading counters or backsplash soon? Leave a small service loop so you can pull a light and reinstall it without rewiring.
These habits keep your system tight and support the long life you expect when you plan how to hardwire under cabinet lighting.
Cost, Time, And When To Hire A Pro
Here is what I see on typical jobs.
- Time. A simple galley kitchen takes 2 to 4 hours. Large kitchens can take a day.
- Cost. DIY parts can run 150 to 600 dollars, depending on fixtures and dimming. Pro installs vary by region and access.
- Hire a pro if you need a new circuit, a crowded panel, or if wall fishing is complex. It is cheaper than fixing drywall and redoing wiring later.
If the budget is tight, phase the work. Pre-run cable and boxes now. Add premium fixtures later. That is still a solid way to approach how to hardwire under cabinet lighting on a timeline.
Frequently Asked Questions of how to hardwire under cabinet lighting
Do I need a permit to hardwire under-cabinet lights?
Many areas require a permit for new wiring. Check with your local building department and follow their rules.
Can I tie into an existing kitchen circuit?
Yes, often a lighting circuit is fine if it has capacity. Do not overload small-appliance receptacle circuits and follow local code rules.
What size wire should I use?
Most lighting circuits use 14/2 NM-B on a 15A breaker or 12/2 on a 20A. Match the breaker rating and never downsize wire on a higher-amp circuit.
Which dimmer should I buy?
Use a dimmer rated for LED and for your driver type. Look for a compatibility list from the fixture or driver maker.
How bright should under-cabinet lights be?
Aim for 200 to 500 lumens per linear foot for task work. Use a dimmer so you can tune it for mood and time of day.
Is low voltage better than line voltage here?
Low voltage is flexible and great for long, even runs. Line voltage bars are simple to wire and can be cleaner for short, discrete sections.
Where should I place the junction box?
Put it in an accessible spot like a base cabinet or pantry wall. Never bury it behind drywall or tile.
Can I mix brands of drivers and lights?
You can, but it raises the risk of flicker or poor dimming. Sticking to one ecosystem is safer and smoother.
What color temperature looks best in kitchens?
Most homeowners like 2700K to 3000K. Pair it with 90+ CRI so food and finishes look natural.
What if my lights buzz or hum?
That is usually a dimmer mismatch or a driver under too light a load. Swap the dimmer to ELV or match the load to the driver’s rated range.
Conclusion
You now have the full roadmap for a clean, code-wise install. You learned how to hardwire under cabinet lighting from planning and safe wiring, to dimming, testing, and quick fixes. Keep the steps simple, match parts that play well together, and respect the code.
If you are ready, sketch your layout today and gather your gear. Prefer a second set of hands? Bring in a pro for the feed and do the fixtures yourself. Want more guides like this? Subscribe for updates or drop a comment with your layout and questions.