Measure, clean, stick, connect to a sized power supply, then test.
If you want to learn how to install LED strip lights the right way, you’re in the best place. I’ve planned, wired, and mounted hundreds of runs in homes and studios. This guide explains how to install LED strip lights with pro tips, simple steps, and real fixes you can trust. Read on to get a clean look, safe wiring, and long life from your lights.
What You’ll Need
- LED strip lights Choose the right voltage, color, density, and rating.
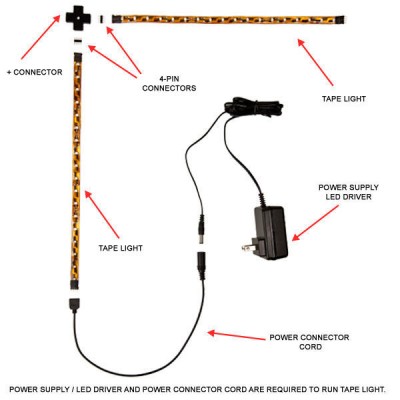
- Power supply Match the strip voltage and watts with 20% headroom.
- Controller and remote Optional for dimming, color, scenes, or smart control.
- Channels and diffusers For clean lines, better heat control, and soft light.
- Connectors or solder gear Choose clip connectors or a soldering iron and heat shrink.
- Wire Stranded low-voltage wire sized for the amp load and run length.
- Cleaners and tape Isopropyl alcohol, lint-free cloths, and extra 3M VHB tape.
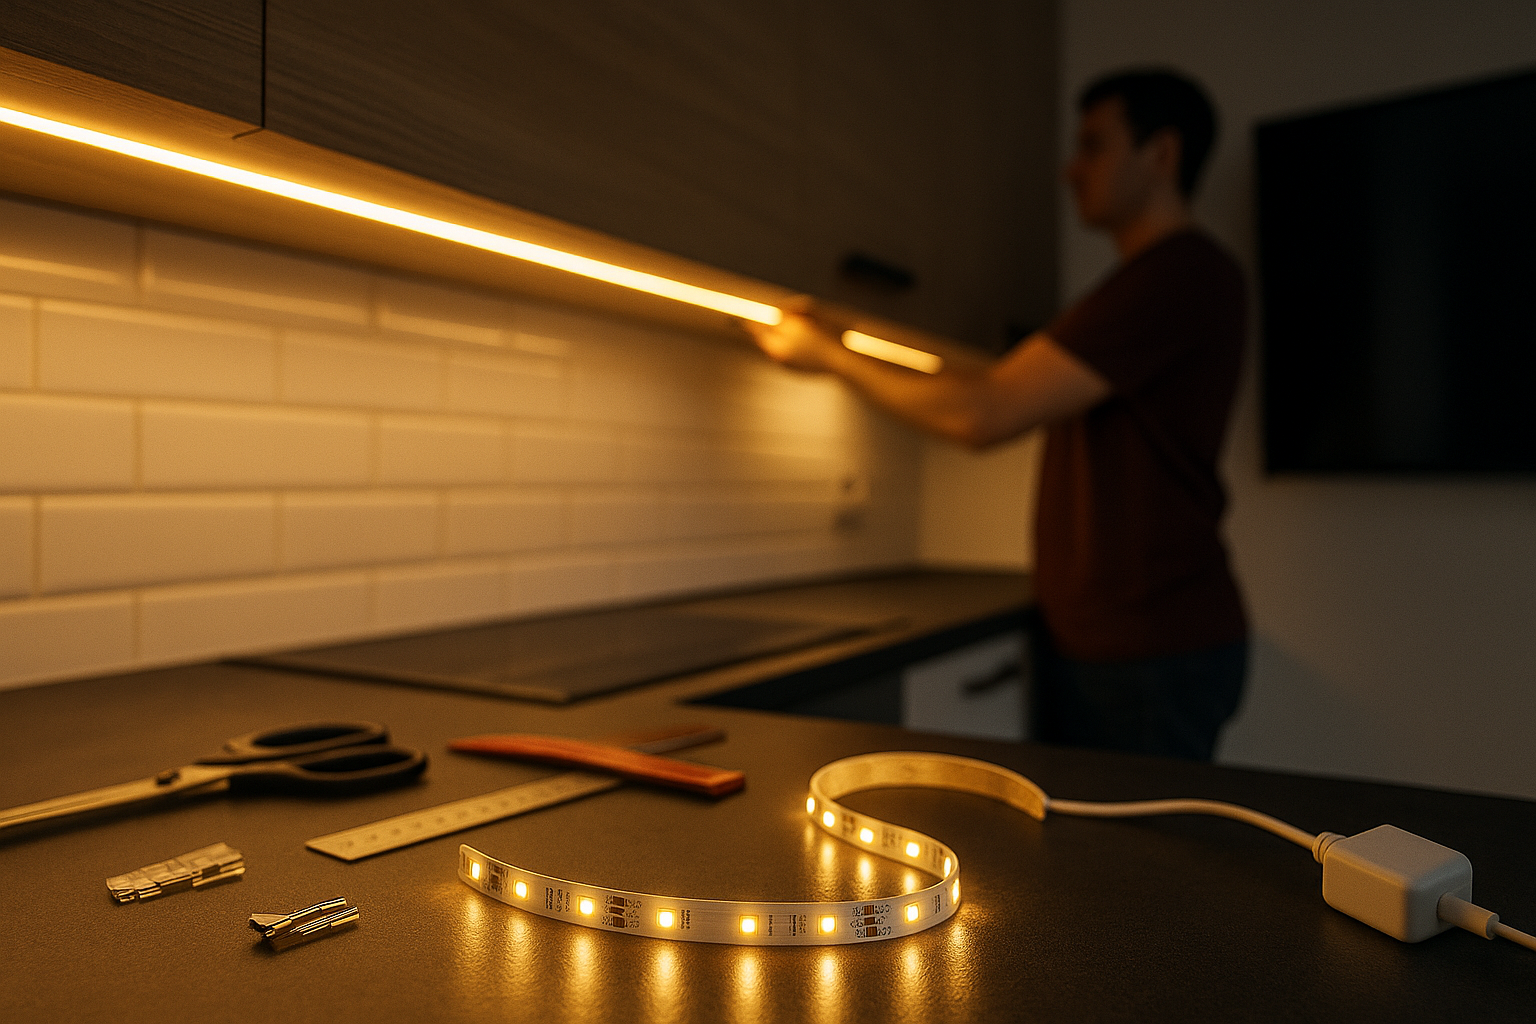
- Tools Scissors, measuring tape, pencil, drill with bits, screwdriver, wire strippers.
- Safety gear Voltage tester, cable ties, and cable clips.
Tip from the field: test every strip section on the bench before you mount it. That five minutes can save an hour of rework.

Plan Your Layout Like a Pro
Good light starts with a simple plan. Sketch your space. Mark where power will live. Measure each run. Note corners, gaps, and where you will hide wires and the driver.
Match the strip specs to your goal:
- Voltage 12V is flexible for short runs. 24V helps with long runs and drop.
- Brightness Look at lumens per foot and LED density (e.g., 60, 120, 180 LEDs/m).
- Color Choose 2700K to 3000K for warm, 4000K neutral, 5000K cool. For RGB or RGBIC, plan for a controller.
- CRI 90+ gives true colors for kitchens and desks.
- IP rating IP20 is dry indoor. IP65 is splash resistant. IP67 is wet and outdoor.
Size the power supply:
- Add up the strip watts per foot times total feet.
- Add 20–30% headroom for safe run time and less heat.
- Example If your strip draws 4W/ft and you have 16 ft, 64W total. Choose at least an 80W, 24V Class 2 power supply.
Respect max run length:
- Most reels have a max run before voltage drop shows.
- Split long runs into parallel feeds from the same driver.
If you search how to install LED strip lights, planning is the hidden step that sets up every other choice. A 10-minute plan saves you from dim ends, color shift, and messy glue lines later.
Surface Prep and Mounting Options
Clean the surface first. Wipe with isopropyl alcohol and let it dry. Dust and grease kill tape grip fast.
Pick a mount that fits your look and heat needs:
- Adhesive backing Fast and simple under cabinets and shelves. Add VHB tape if the stock tape feels weak.
- Aluminum channels They act like a heat sink and hold a diffuser for a smooth line of light.
- Clips and brackets Great for rough surfaces, ceilings, or outdoors.
- Behind TVs and monitors Use corner channels or foam spacers to lift the strip and boost glow.
Test-fit with painter’s tape. Stand back and check the sight line. I once skipped this on a bookcase and had bright dots in my eyes at night. A quick dry fit would have fixed that.
Electrical Basics: Power, Polarity, and Wiring
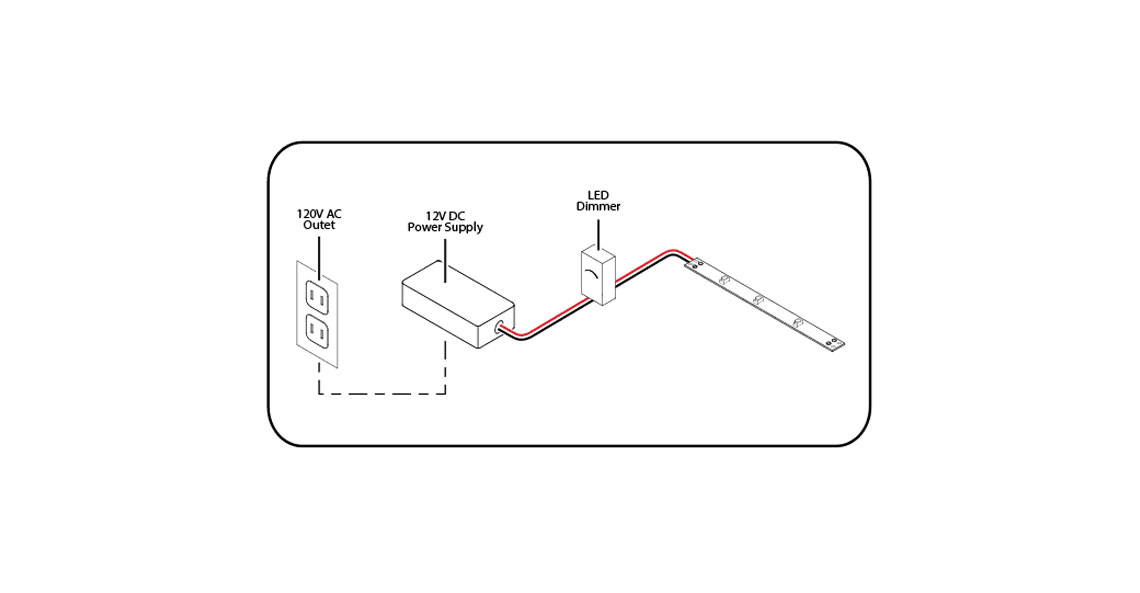
Match strip voltage and power supply. Do not hook a 12V strip to 24V. Check the markings on both.
Follow polarity. Plus to plus, minus to minus. For RGB or RGBW, line up R, G, B, W, and +12/24V.
Wire long runs in parallel, not end-to-end, to limit drop. Keep home runs short and even. Use thicker wire for longer paths or higher loads. As a guide, 18 AWG is fine for short, low loads. Go 16 or 14 AWG for longer or brighter runs.
Use listed drivers and controllers. Look for UL or ETL marks and Class 2 labels for home use. Keep drivers in a spot with airflow. Warm parts fail fast.
Solder gives the best bond. Clip connectors are fine for light duty and quick changes. Either way, strain relief the joints so the tape does not carry the load.

Step-by-Step: How to Install LED Strip Lights
- Measure the run
- Measure the full path. Add extra for bends and test leads.
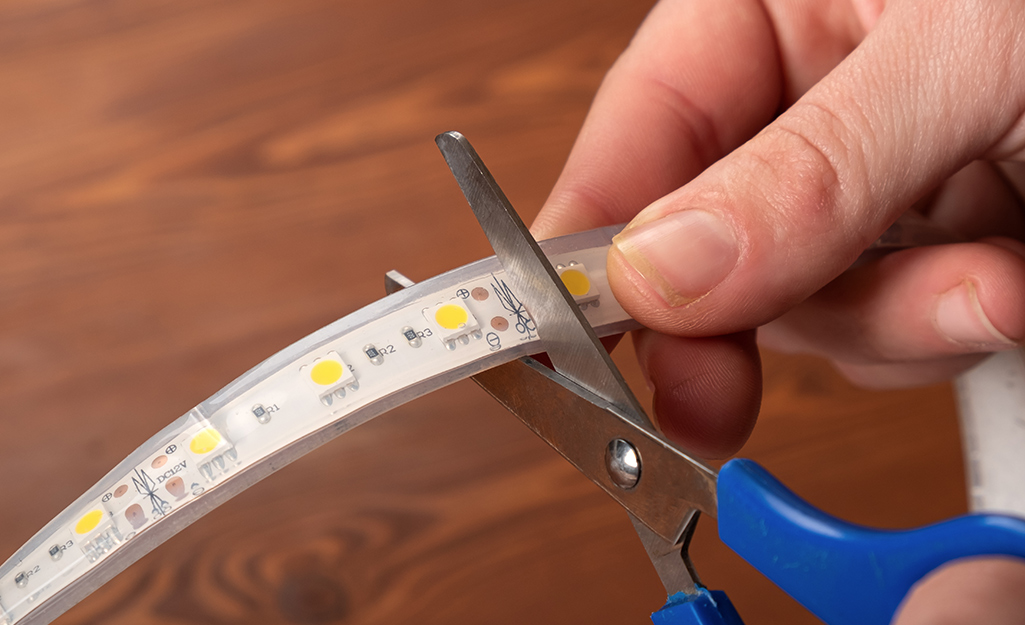
- Cut at the marks
- Only cut on the copper pad lines. Use sharp scissors for a clean edge.
- Test the pieces
- Power each section on the bench. Check for dead LEDs and even color.
- Prep the surface
- Clean with alcohol. Let dry. Mark the start, ends, and any joints.
- Dry fit the layout
- Hold the strip in place with painter’s tape. Confirm the look and wire paths.
- Mount channels if used
- Drill pilot holes. Screw in channels. Snap in diffusers after wiring.
- Stick the strip
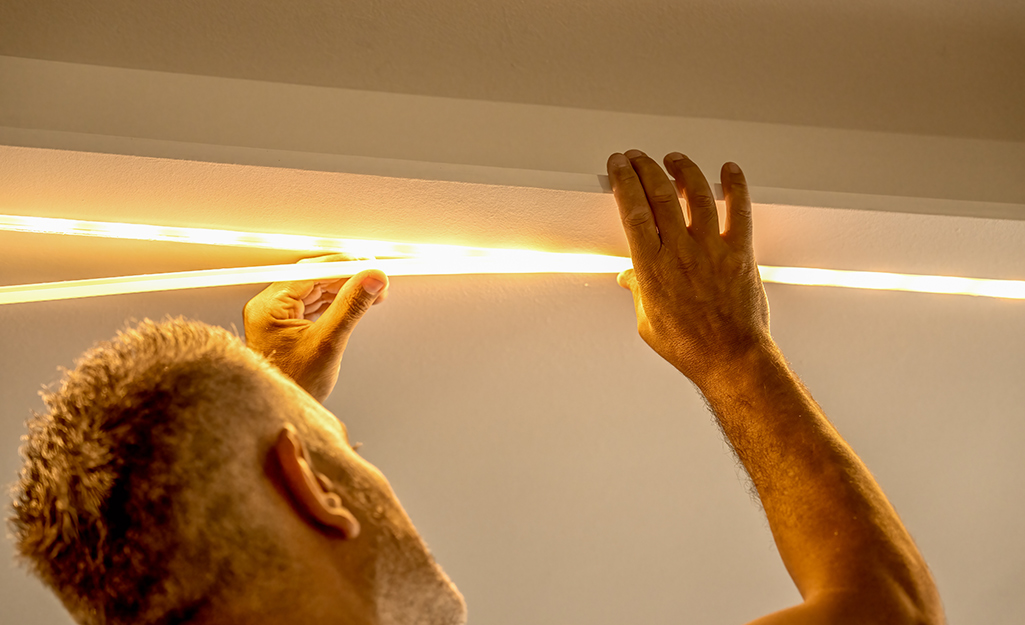
- Peel a little backing at a time. Press as you go. Do not stretch the strip.
- Make the connections
- Align polarity. Solder or use rated connectors. Add heat shrink or covers.
- Place the driver and controller
- Mount in a hidden, cool spot with space to breathe. Keep access for service.
- Power on and test
- Check every zone for brightness and color. Dim to 10% and back up to 100% to catch flicker or weak joints.
This is how to install LED strip lights with clean results. Take it slow, test often, and you will get a smooth, even glow.
Smart Controls, Dimming, and Scenes
Pick your control type:
- IR Simple, cheap, line-of-sight remotes.
- RF Better range and no aiming.
- Wi‑Fi, Zigbee, or Matter App control, voice, and scenes across rooms.
For white strips, use a PWM low-voltage dimmer or a driver made for in-wall dimmers. Many standard wall dimmers do not play well with LED drivers and can cause buzz or flicker. Read the driver spec sheet to match dimmer types.
Program scenes. Set a warm 30% glow for late nights. Use a cool 100% for task time. If you ask how to install LED strip lights with smart features, the best path is a listed driver plus a well-known brand controller that updates often.
Common Mistakes and How to Avoid Them
- Wrong power size Strips dim or fail. Always add 20–30% headroom.
- Overlong runs Ends go dim. Feed long runs in parallel.
- Skipping surface prep Tape lifts. Clean with alcohol and use channels in warm spots.
- Tight bends Damaged LEDs. Use corner connectors or gentle loops.
- Mixing voltages Dead strips. Match 12V or 24V end to end.
- Hot, closed driver Early failure. Allow airflow and follow load limits.
- Random parts Poor color or flicker. Stick with UL/ETL listed drivers and known controllers.
I learned to never peel the full adhesive at once. Work a foot at a time. It keeps the line straight and saves the backing from sticking to itself.
Maintenance, Troubleshooting, and Repairs
If a section is dark, check the closest joint. Re-solder or replace the connector. Confirm polarity.
If colors are off on RGB, one channel wire is loose. Reseat the plug or reflow the joint.
If lights flicker, test at lower and higher dim levels. That flags a weak driver, noisy dimmer, or bad splice.
If tape peels, clean the surface and switch to an aluminum channel with VHB tape. Heat and dust are the usual foes.
When you think about how to install LED strip lights for the long haul, plan for small service loops and easy access to the driver. Future you will thank you.
Safety, Codes, and Warranty Tips
Use Class 2 low-voltage power supplies in homes. Look for UL or ETL marks. This helps meet US safety codes.
Keep drivers dry and ventilated. In baths or kitchens, use IP65 or better near splash zones. Use GFCI outlets where required.
Do not run strips inside closed walls unless the system is listed for that use. Follow the strip’s max run and bend rules.
Keep your receipts and lot numbers. Many brands offer 2–5 year warranties. Photos of your install and a wiring sketch make support fast.
These steps reflect how to install LED strip lights that are safe and code-friendly. It protects your space and your gear.
Frequently Asked Questions of How to Install LED Strip Lights
How many watts do I need for my LED strips?
Add up the watts per foot times your total length, then add 20–30% headroom. Choose a driver that matches the strip voltage and exceeds that total.
Can I cut LED strips anywhere?
No. Only cut on the marked copper pads. Cutting elsewhere can break the circuit and void the warranty.
How do I stop my strips from falling?
Clean with alcohol, use VHB tape or aluminum channels, and press firmly as you mount. Heat and dust are the main reasons adhesive fails.
Why are the ends of my strip dim?
That is voltage drop or an overlong run. Feed long runs in parallel or step up to 24V strips and shorter feed points.
Will a wall dimmer work with LED strips?
Use a compatible low-voltage driver rated for wall dimmers, or use a PWM dimmer on the low-voltage side. Mixing random dimmers and drivers can cause flicker.
Do I need a controller for white-only strips?
No, but a dimmer is nice to have. For tunable white or RGB, you will need a controller.
Can I use LED strips outdoors?
Yes, with the right IP rating and UV-safe materials. Seal joints, use weatherproof channels, and keep the driver in a dry spot.
Conclusion
You now know how to install LED strip lights from plan to power to polish. Measure well, size the driver right, prep the surface, and test at each step. Small checks add up to steady light and a clean look.
Pick one area at home and try a short run today. Under a shelf or behind a TV is a great start. If this helped, subscribe for more hands-on guides, or leave a comment with your setup and questions.