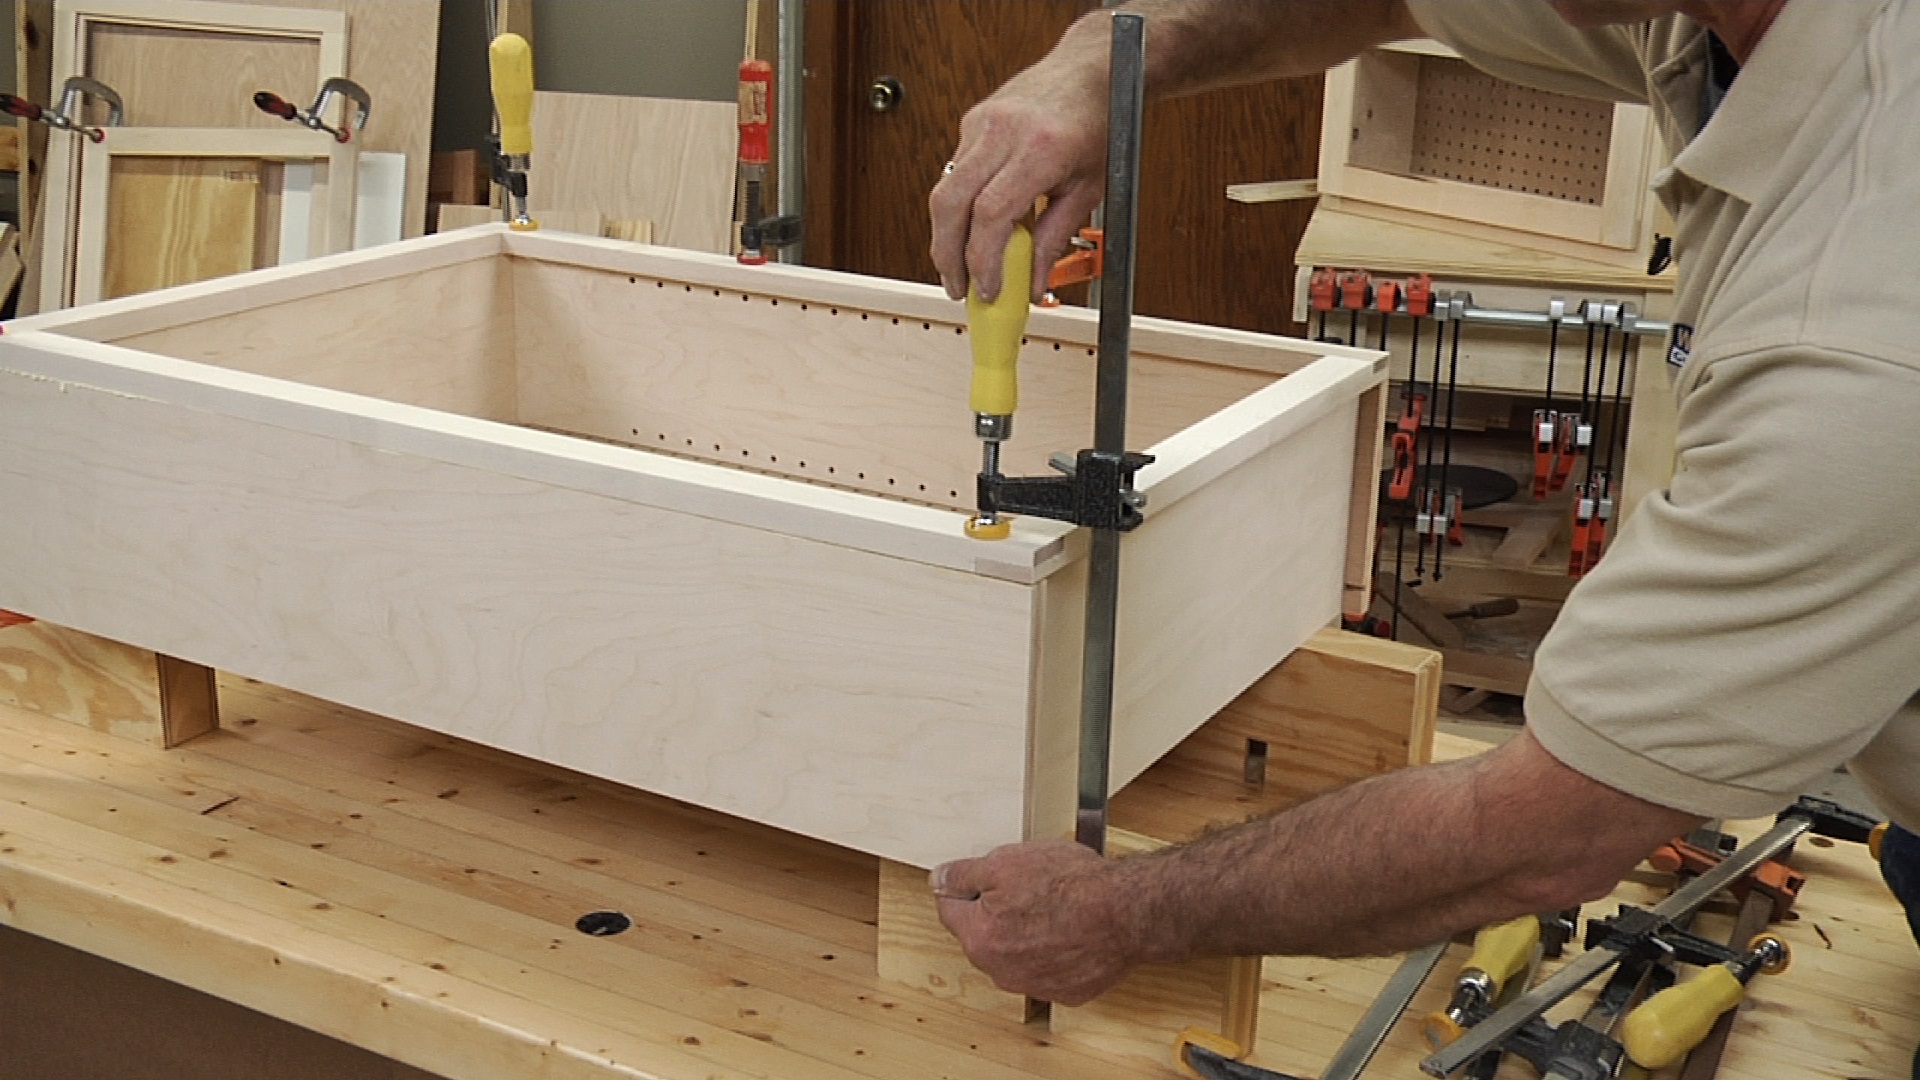
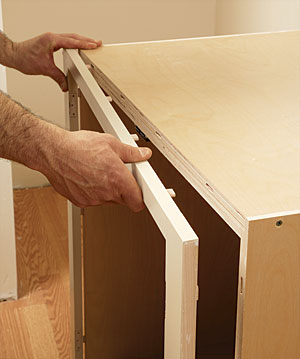
Attach a face frame by gluing, clamping, and adding pocket screws or pins.
You want clean lines, tight seams, and doors that hang true. In this guide, I’ll show you how to attach face frame to cabinet the way pros do it in the shop and on site. We will cover tools, layout, reveals, glue control, and fixes. Follow along and your face frame will look factory-made and last for years.

What a Face Frame Does and Why It Matters
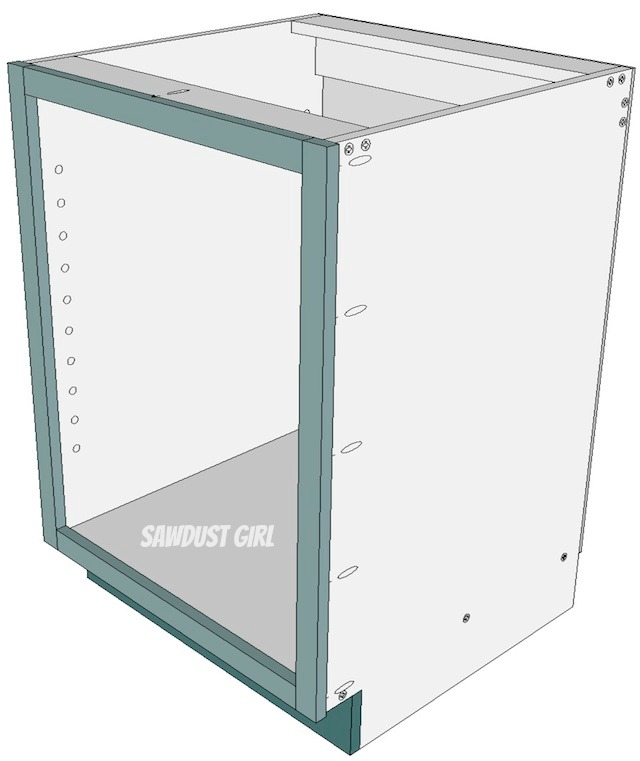
A face frame is the hardwood frame that covers the cabinet edges. It has vertical stiles and horizontal rails. It stiffens the box, cleans up plywood edges, and sets the door and drawer reveals.
Good attachment improves strength and keeps doors from rubbing. It also hides small flaws in the carcass. This is the base layer for perfect hinges and hardware later.

Tools and Materials You’ll Need
Have your tools ready. Set them within arm’s reach before you glue.
- Clamps. Use parallel clamps, F-clamps, and spring clamps.
- Cauls. Use straight boards wrapped in tape to spread pressure.
- Adhesive. Use PVA wood glue. A fast tack CA + activator is handy for spot tacking.
- Fasteners. Use 23-gauge pins or 18-gauge brads. Use pocket screws for hidden strength.
- Jigs. Use a pocket hole jig and dowel or biscuit joiner if you prefer.
- Measuring. Use a tape, square, combo square, and a pencil or knife.
- Prep tools. Use a block plane, sanding block, chisel, and flush trim router.
- Safety. Use eye protection, hearing protection, and glue-safe gloves.
Set up a clean, flat bench. Have a damp rag for squeeze-out. Keep blue tape nearby.

Plan the Reveal and Dry Fit First
Start dry. Place the face frame on the cabinet. Check that the rails and stiles overhang a bit so you can flush trim later.
Mark center points for door openings. Mark hinge sides. Confirm your reveal. For inset doors, be exact. For overlay doors, focus on even margins. Dry fit clamps and cauls so you know the order. This planning makes how to attach face frame to cabinet feel easy when glue hits wood.

Methods to Attach a Face Frame
There are several reliable ways to attach a face frame. Choose based on your tools and the job.
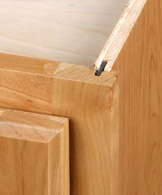
Glue and Pins
- Spread a thin, even coat of PVA on carcass edges. Clamp the frame in place.
- Shoot 23-gauge pins to hold alignment. They leave tiny holes and have low split risk.
- Use 18-gauge brads only where you can fill and hide holes.
Pros: Fast and clean. Cons: Pins add little strength, so clamping is key.
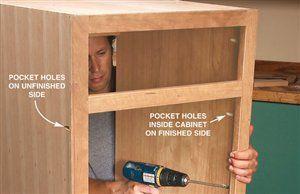
Pocket Screws from Inside
- Drill pocket holes on the inside edges of the cabinet front.
- Apply glue, set the frame, clamp, and drive screws from inside the box into the frame.
- Use fine-thread for hardwood, coarse for softwood.
Pros: Strong and hidden. Cons: Needs a jig and space inside the box.
Biscuits, Dowels, or Domino
- Cut slots or holes across the joint. Add glue and assemble with clamps.
- This improves alignment and strength on tall or heavy frames.
Pros: Great for alignment. Cons: More setup and tools.
Adhesive Notes
- Use wood glue for long-term strength. It bonds wood fibers well.
- Avoid thick construction adhesive on fine work. It can hold the frame proud and stay rubbery.
Each method works. The pro move is often glue plus pocket screws or glue plus pins and clamps.
Step-by-Step: How to Attach Face Frame to Cabinet
Use this workflow when you ask how to attach face frame to cabinet and want pro results.
- Check square
- Measure diagonals of the cabinet box. They should match. Shim or clamp the box square if needed.
- Prep the frame
- Plane any bumps on the back of the stiles and rails. Sand to 180 grit. Dust off.
- Dry fit with clamps
- Place cauls across the frame. Add a few spring clamps to test pressure. Mark clamp spots.
- Mark reference lines
- Strike a light pencil line on the carcass to locate the frame. Mark center lines for openings.
- Apply glue
- Run a thin bead on carcass edges and along internal webs. Spread with a brush. Less is more.
- Set and align
- Place the face frame onto the glue. Align to your marks. Focus first on the hinge stile.
- Lock the position
- Use two clamps to lock the hinge stile and top rail. Check reveals around openings.
- Add fasteners
- Shoot a few 23-gauge pins through the hinge stile into the carcass to stop creep. Or drive pocket screws from inside while clamped.
- Clamp for pressure
- Place parallel clamps across the width and height. Use cauls to spread pressure. Check that the frame sits flat.
- Recheck square and reveal
- Measure diagonals again. Nudge with clamp pressure as needed. Wipe squeeze-out at once.
- Flush trim and sand
- After the glue cures, use a flush trim router or block plane to bring frame edges even with the box. Sand the joint smooth.
- Fill and finish
- Fill tiny pin holes. Spot sand. You now know how to attach face frame to cabinet with tight seams and true lines.
I use this order in the shop. It keeps parts from drifting and protects reveals during clamp up. It is the safest answer to how to attach face frame to cabinet when you work solo.
Edge Cases and Pro Tips from the Shop
Real cabinets are not always square. Here is how I handle the tricky parts.
- Out-of-square boxes. Clamp with diagonal cauls to pull things true before glue. Small shims behind the frame can save a run.
- Multi-cabinet runs. Clamp, level, and screw boxes together first. Then set long face frames as a unit for perfect seams.
- Scribing to walls. Leave the wall-side stile fat by 1⁄8 inch. Scribe and plane to fit after the frame is on.
- Blue tape as a clamp. Tape across joints to hold alignment while you place real clamps.
- Glue control. Use a micro roller for thin coats. Seal end grain with a dab first for stronger joints.
These tips make how to attach face frame to cabinet smooth even in old houses.
Finishing, Sanding, and Hinge Layout Checks
Do a slow pass with bright light. Your fingertips will find flaws your eyes miss.
- Flush the frame to the sides first. Then sand the face to 180 or 220 grit.
- Fill nail holes with a color-matched filler. Spot prime if you will paint.
- Mark hinge cup setbacks now. Pre-drill pilot holes for screws so you do not split the frame.
This finish pass locks in quality before doors and drawers go on. It caps how to attach face frame to cabinet with a clean, pro look.
Common Mistakes and How to Fix Them
Mistakes happen. Here is how to fix them fast.
- Frame drift during clamp up. Add one pin or a pocket screw near the hinge stile to lock it.
- Gaps at rails. Use cauls and a deeper clamp. Warm the glue with a heat gun if you must reset.
- Glue squeeze-out in corners. Use a straw or toothbrush while wet. If dry, scrape gently with a chisel.
- Proud edges. Use a flush trim bit with a bearing. Then block sand to blend.
- Splits from brads. Stop and wick in thin CA glue. Sand and fill after it cures.
If you plan each move, you will not need big fixes. That is the quiet secret behind how to attach face frame to cabinet like a pro.
Safety and Quality Checks
Safety is part of the craft. Good checks protect you and the work.
- Wear eye and ear protection. Keep fingers clear of nailers and router bits.
- Clamp work before drilling or routing. Never hold small parts by hand.
- Final QA. Check diagonal measurements, reveal at openings, smooth seams, and hinge layout marks.
A short checklist at the end is smart. It locks in the results you want.
Frequently Asked Questions of how to attach face frame to cabinet
What glue should I use for a face frame?
Use PVA wood glue for most hardwood frames. It cures strong and sands well.
Are pocket screws enough without glue?
Use both for best results. Glue builds a long-lasting bond, while pocket screws clamp and reinforce from inside.
Can I attach the frame after installing the cabinet on the wall?
Yes, but support the cabinet and use more clamps. Dry fit twice and check reveals since wall waves can shift alignment.
Should I pre-finish the face frame before attaching?
You can pre-finish if you mask glue areas. I usually attach first, then finish, so I can sand the seam perfect.
What nail size works best if I skip pocket screws?
Use 23-gauge pins for minimal holes and split risk. Use 18-gauge brads only where filler is easy to hide.
How do I attach a face frame to melamine or prefinished plywood?
Scuff the edges and use PVA with a light sand for tooth. Pocket screws help a lot because melamine’s glue bond is weaker.
How do I keep the frame from sliding on wet glue?
Clamp the hinge stile first and add one pin. A light mist of activator on a CA glue tack point can help hold it still.
How much overhang should I leave for flush trimming?
Leave about 1⁄32 to 1⁄16 inch overhang. It gives you room to flush trim without risking a dip into the carcass.
Conclusion
You now have a clear plan for how to attach face frame to cabinet with clean joints, even reveals, and strong bonds. Prep well, clamp smart, and lock the frame with pocket screws or pins as needed. Small details like cauls, light glue coats, and careful sanding make all the difference.
Ready to build with confidence? Put these steps to work on your next cabinet, share your results, and subscribe for more pro shop guides and checklists.