Measure, add backer strips, cut tight miters, then nail, fill, and caulk.
If you want a built-in look without hiring a pro, this guide is for you. I’ll show you how to install crown molding on RTA cabinets with the same steps I use on client kitchens. We’ll cover planning, tools, cuts, and clean finishes so your cabinets look custom and seamless from any angle.

Tools and materials
Gather everything before you start. It keeps your pace steady and your cuts clean. This list is tuned to how to install crown molding on RTA cabinets in real homes.
Essential tools
- Miter saw with sharp fine-tooth blade
- 18-gauge brad nailer and air compressor or cordless brad nailer
- Pin nailer for delicate trim (optional)
- Drill/driver and bits
- Measuring tape, combination square, and angle finder
- Coping saw or oscillating tool (optional, for coping joints)
- Caulk gun
- Sanding block or sanding sponge
- Stud finder and small level
Materials
- Crown molding matched to your cabinet style
- Riser or filler strips if your crown needs height
- Backer blocks or continuous nailing cleats
- Wood glue and fast-grab construction adhesive
- Painter’s tape and clamps
- Wood filler and paintable caulk
- Touch-up paint, primer, or stain and finish
- 1 to 1-1/2 inch brad nails
Pro tip from the field: Pre-prime and pre-paint long sticks before you cut. Touch up after install. It saves hours.
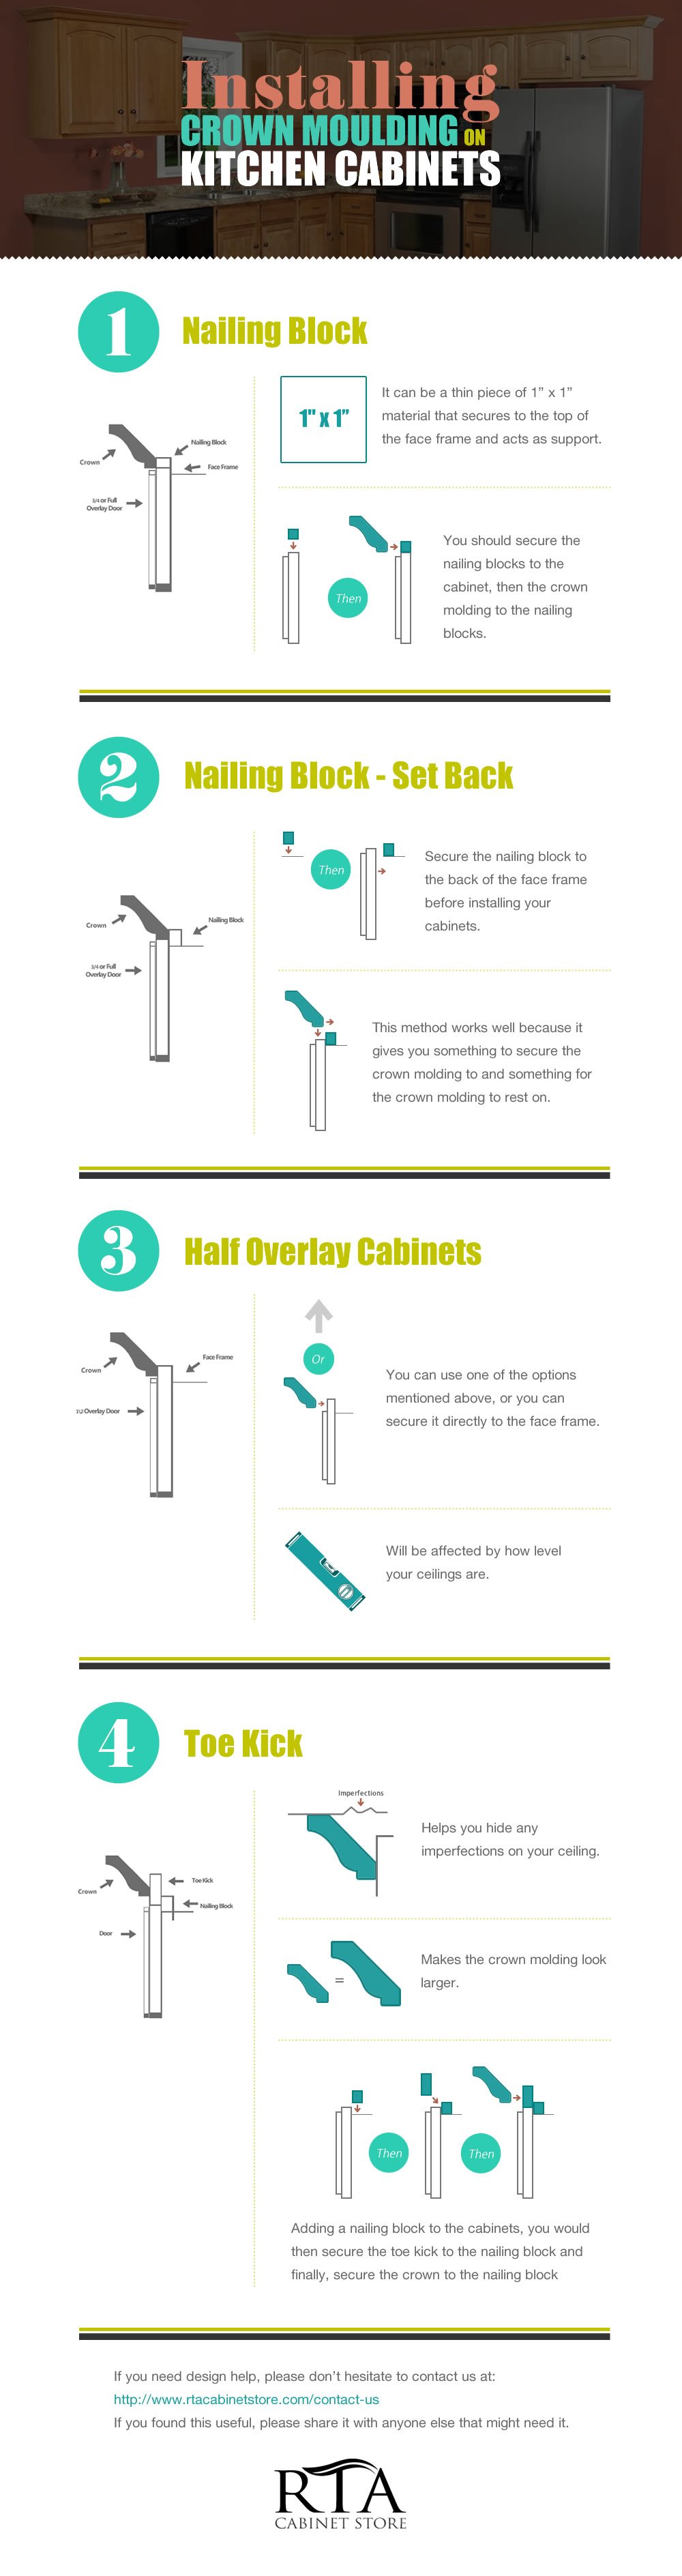
Understand crown molding on RTA cabinets
Here’s the core idea. Cabinets rarely provide a perfect nailing surface at the top. So you add a riser or backer strip to hold the crown at the right angle. This is the heart of how to install crown molding on RTA cabinets.
Key concepts
- Riser vs backer: A riser lifts crown to the ceiling. A backer is a cleat behind the crown to catch nails.
- Spring angle: Many crowns sit at a preset angle, like 38/52 or 45/45. Cut in the same orientation each time.
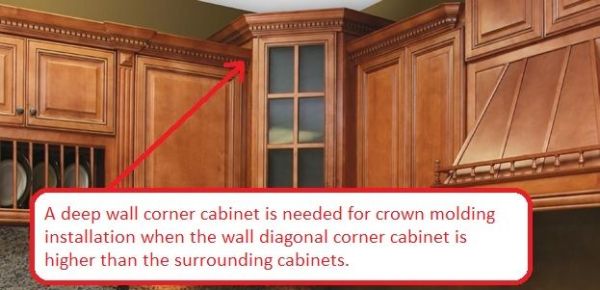
- Framed vs frameless: Framed cabinets have a face frame to align with. Frameless boxes may need L-brackets or interior cleats for support.
- Ceiling issues: Ceilings are rarely flat. Plan for scribing or a small caulk line.
Personal note: I have installed crown on dozens of RTA kitchens. The smoothest jobs used continuous backer strips and dry fits at each corner before any nails.
Plan and measure
Good plans prevent gaps. This is the quiet secret of how to install crown molding on RTA cabinets.
Steps to plan
- Sketch the run. Mark outside and inside corners.
- Decide the reveal. How much crown shows above the doors? Keep it even.
- Choose riser height if going to the ceiling. Leave a small caulk gap if needed.
- Mark where cleats will go. Keep them flush and straight along the cabinet tops.
- Confirm door clearances. Open doors fully to ensure crown won’t block hinges.
Quick PAA-style Q&A
- Do I need a riser if my cabinets don’t hit the ceiling? Only if you want crown to reach the ceiling. Otherwise, install crown as a trim band on a backer.
- Can I join two sticks in a long run? Yes, use a 30 to 45 degree scarf joint over a cleat, with glue and nails.
Pro tip: Label every corner cut on blue tape. L-OUT, R-IN, etc. It keeps your miters straight.

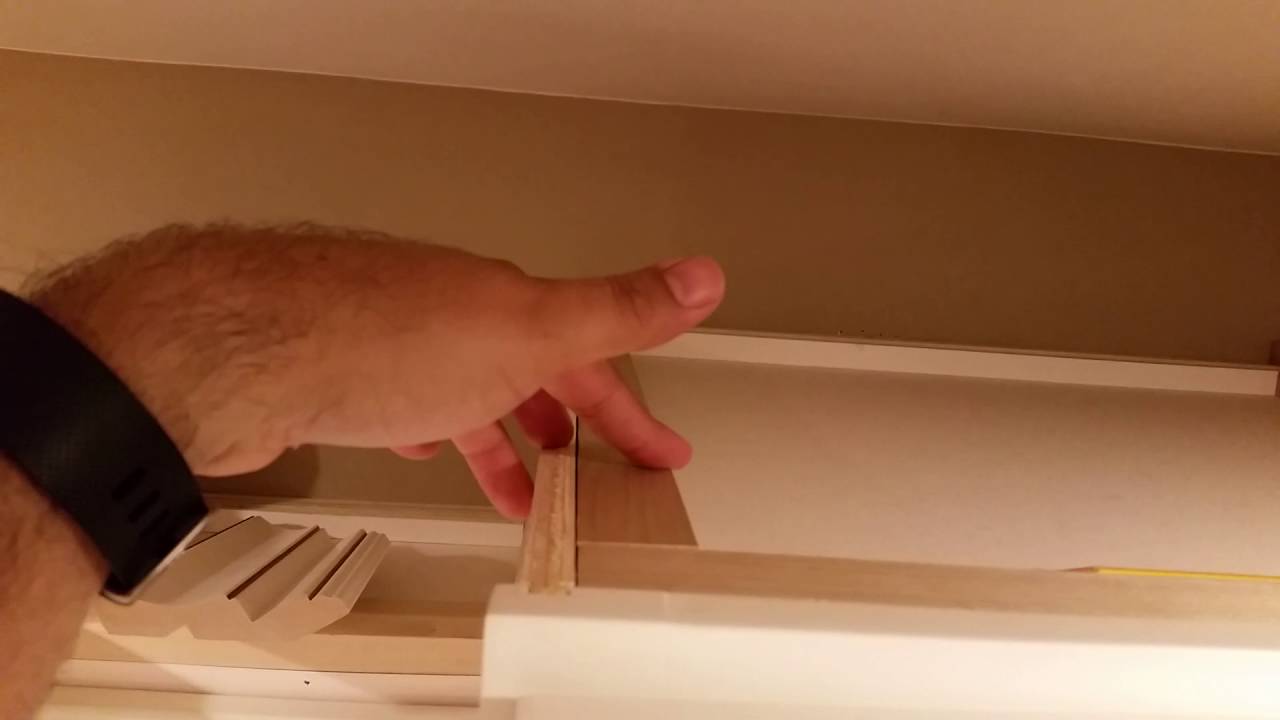
Prepare the cabinets
Solid prep makes the install fast and clean. This stage anchors how to install crown molding on RTA cabinets with fewer surprises.
What to do
- Acclimate molding for at least 24 to 48 hours in the room.
- Check cabinet tops for level. Shim if needed.
- Rip and prefinish risers and backer cleats.
- Install cleats. Glue and brad-nail them to the tops, flush with the cabinet faces. Use short screws where nails won’t bite.
- For frameless, add interior angle brackets and a front cleat that aligns with the door plane.
Safety note: Wear eye and ear protection. Keep hands wide of the blade, and let the saw reach full speed before each cut.
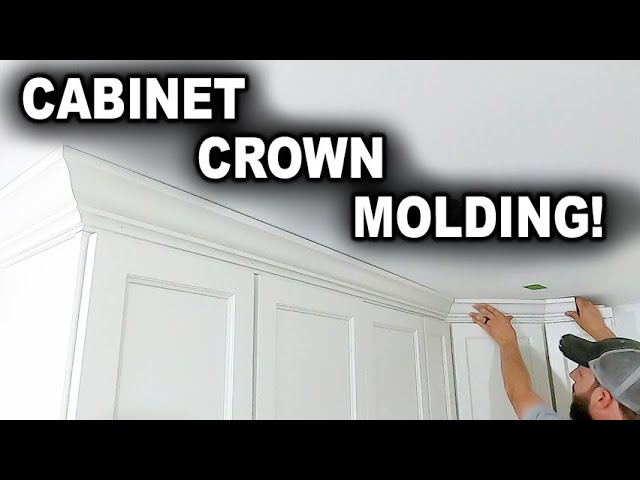
Step-by-step: how to install crown molding on RTA cabinets
This is the exact, repeatable process I use on site. Follow each step to learn how to install crown molding on RTA cabinets without stress.
-
Dry fit and mark
- Hold a stick in place against the cleat or riser.
- Mark the wall and cabinet for length and corner locations.
- Note the orientation of the crown. Keep it consistent on the saw.
-
Cut your first piece
- For inside corners, cut a 45 degree miter or cope one piece to fit the other.
- For outside corners, cut mirrored 45 degree miters.
- Use a fine blade. Support long sticks to prevent flex while cutting.
-
Test the corner
- Bring both pieces to the corner. Check the fit.
- If there’s a slight gap, take a hair off on the miter saw or cope more.
-
Glue and nail
- Apply a bead of wood glue to the backer cleat and miter joint.
- Set the crown in place. Nail into the cleat every 8 to 10 inches.
- Angle a few nails into the cabinet face frame when safe, keeping nails short.
-
Work around the room
- Do corners first. Lock those joints in tight.
- Run straight sections next, using scarf joints on long runs.
- Keep reveals even by referencing door tops with a small block.
-
Fill and sand
- Fill nail holes with wood filler. Wipe excess clean.
- Sand smooth after it sets.
-
Caulk and touch up
- Run a thin line of paintable caulk at the ceiling and riser.
- Touch up with paint or stain. Feather for a factory look.
Frameless note: Add a front cleat aligned with door faces and small L-brackets inside. It gives you bite for nails and keeps the face flat.
Pro trick: For perfect miters, clamp the two crown ends together on a bench, glue, and let them set as a unit. Then lift the assembly to the cabinets and nail it off.

Common mistakes and easy fixes
These are the snags I see most when people ask how to install crown molding on RTA cabinets. The fixes are simple.
-
No backer cleat
- Fix: Add a continuous cleat. Nail through existing crown into the new cleat where possible, or add short screws from behind.
-
Wrong spring angle on the saw
- Fix: Mark the “ceiling” and “cabinet” edges on each stick. Cut in the same orientation every time.
-
Gaps at corners
- Fix: Recut or cope one side. Caulk can hide hairlines, not big gaps.
-
Nail blowouts
- Fix: Use shorter brads. Angle nails so they bite the cleat, not the cabinet face.
-
Wavy reveal
- Fix: Use spacers and a pencil line. Nail only after the reveal is steady.

Source: rtawoodcabinets.com
- Fix: Use spacers and a pencil line. Nail only after the reveal is steady.
Finishing for a factory look
This is where jobs go from good to great. It also locks in how to install crown molding on RTA cabinets for a pro finish.
- Caulk tiny gaps only. Push caulk into seams, then smooth with a damp finger.
- Feather touch-up paint far past each filled hole.
- For stain-grade, use color-matched filler and a light hand with sanding.
- Run a final quality check at eye height and from across the room.
Personal tip: I keep a warm light and a cool light handy. Shadows change with color temp. If it looks clean in both, it’s clean.

Cost, time, and skill level
Set clear expectations and you’ll enjoy the process. This is a fair view of how to install crown molding on RTA cabinets.
- Cost: Basic crown starts low per linear foot. Specialty profiles and stacked moldings cost more. Add a bit for cleats and fasteners.
- Time: A small kitchen can be done in a day. Bigger jobs or stain-grade can take a weekend.
- Skill: Beginner to intermediate. Practice a few sample cuts first. It pays off.

Source: americanmadecabinets.com
Safety and compliance
Even small trim jobs deserve care. Safe work is part of how to install crown molding on RTA cabinets.
- Use PPE: glasses, hearing protection, and dust mask when sanding.
- Secure ladders and work platforms.
- Follow tool manuals. Keep blades sharp to avoid kick.
- Follow local codes and the cabinet maker’s guide. Respect load limits on cabinet tops.
Maintenance and care
A little upkeep keeps the crown tight and clean. It rounds out how to install crown molding on RTA cabinets with long-term results.
- Wipe dust with a soft cloth. Avoid harsh cleaners on finished wood.
- Recaulk hairline cracks if seasons open joints a touch.
- Touch up paint as needed. Keep a labeled jar of your finish on hand.
Frequently Asked Questions of how to install crown molding on rta cabinets
What size nails should I use for cabinet crown?
Use 18-gauge brads that are 1 to 1-1/2 inches long. Aim into a cleat or face frame, not just thin cabinet skins.
Should I cope inside corners or miter them?
Coping gives tighter joints on walls that are not square. On cabinets, clean miters work well if your cleats are straight and you dry fit.
How do I deal with an uneven ceiling?
Leave a small, even gap and caulk it after paint. A riser can also help you scribe to the ceiling for a tighter look.
Can I install crown on frameless RTA cabinets?
Yes. Add a front cleat and interior brackets for support. Keep the face of the crown flush with the door plane.
Do I install crown before or after painting cabinets?
If painting both, pre-prime and pre-paint the crown. Install, fill, caulk, then do a final touch-up coat for a seamless finish.
How do I join two pieces along a long run?
Use a scarf joint at 30 to 45 degrees over a cleat. Glue, nail, and sand lightly before touch-up.
Will crown block my cabinet doors?
It should not if you keep a steady reveal. Always test door swing during dry fits and adjust the reveal if needed.
Conclusion
You now have a clear, pro-tested plan for cabinet crown that lasts. With careful prep, a steady reveal, and clean joints, your RTA cabinets will look built-in and custom. Take your time, dry fit, and let the tools work for you.
Ready to start? Pick a short run, make a practice cut, and install your first corner today. If this helped, subscribe for more DIY cabinet upgrades or drop your questions in the comments.