
You can install a light fixture in under an hour with basic tools.
If you want a quick, safe upgrade that adds style and light, this guide walks you through how to install a light fixture like a pro. I’ve installed hundreds in homes old and new, and I’ll show you clear, step-by-step methods, safety checks, and real-world tips so you can finish with confidence and a clean result.
:max_bytes(150000):strip_icc()/how-to-replace-ceiling-light-fixture-1824657-03-d0831082affb46be9ab0fb2652da8092.jpg)
Safety First and Tools You’ll Need
Before you learn how to install a light fixture, set up for safety and speed. Working with household power is simple when you slow down, test every wire, and use the right hardware.
Have these tools ready:
- Non-contact voltage tester to confirm power is off.
- Screwdrivers, both Phillips and flat.
- Wire stripper and needle-nose pliers.
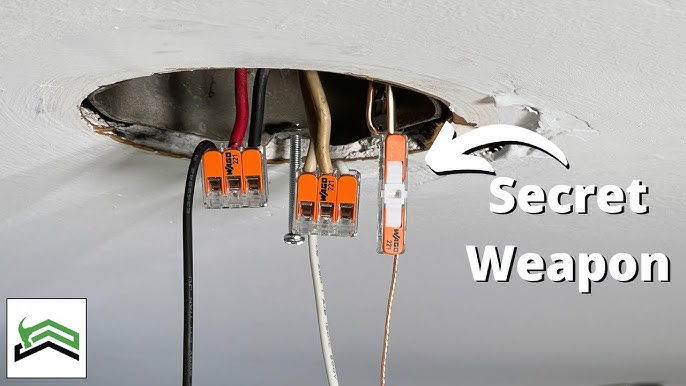
- Wire connectors (wirenuts or push-in connectors).
- Electrical tape for labeling, not for securing wirenuts.
- Ladder or step stool that locks open.
- Headlamp or work light.
- New mounting bracket if your fixture includes one.
- Optional: torque screwdriver for precise terminal screws.
Key safety habits:
- Turn off the breaker, not just the switch.
- Test all wires and the metal box with a voltage tester before you touch anything.
- Support the fixture so it does not hang on the wires.
- If the box is loose or not rated for the weight, replace it before you proceed.
A calm setup is half the job. With this gear and plan, you’ll move fast and stay safe.

Understand Your Electrical Box and Wires
Knowing what you see in the ceiling makes how to install a light fixture easier. Most ceiling boxes are metal or plastic and are rated for a fixture up to 50 pounds. Fan-rated boxes are different and are clearly marked. If your fixture is heavy or a chandelier, check the rating and install a brace if needed.
Common wire colors:
- Black or red is hot.
- White is neutral.
- Bare or green is ground.
Older homes may have a white wire used as hot on a switch loop. If so, it should be re-identified with black tape. If you find aluminum wires (often marked AL), stop and call a pro. Aluminum needs special connectors and methods.
The box must be flush with finished surfaces. If it sits back in plaster, use a box extender for a proper, code-friendly fit.

Step-by-Step: How to Install a Light Fixture
This is the clear, repeatable method I use on service calls. Follow it to learn how to install a light fixture the right way.
-
Kill power at the breaker
- Switch off the correct circuit at the panel.
- Tape the breaker if others are working nearby.
-
Confirm power is off
- Use a non-contact voltage tester on each wire and the box.
- Test the tester on a known live source first.
-
Remove the old fixture
- Take out bulbs and shades.
- Support the body with one hand while you remove the screws.
- Lower it and expose the wiring.
-
Document wiring
- Snap a quick photo of the old connections.
- Note which wire goes to hot, neutral, and ground.
-
Disconnect and prepare
- Unscrew wirenuts and separate wires.
- Straighten wire ends and strip about 1/2 inch of insulation if needed.
-
Inspect the box and support
- Wiggle the box. Tighten or replace if loose.
- Confirm the box is rated for the fixture’s weight.
- If not rated, install a support brace or a proper box.
-
Install the mounting bracket
- Attach the new bracket to the box screws.
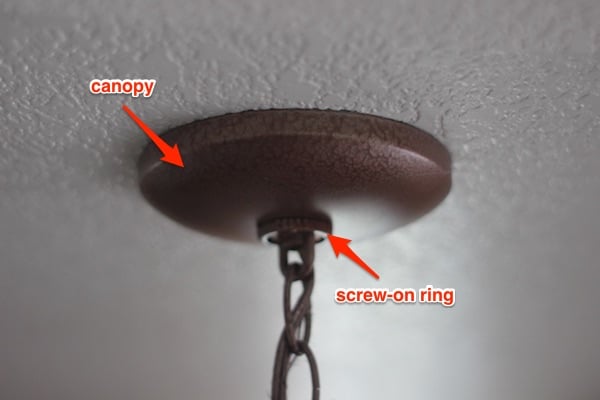
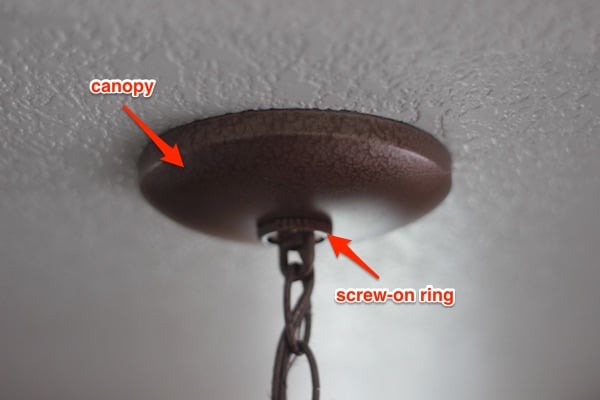
- Center it so the canopy will sit tight to the ceiling.
- If the threaded post is adjustable, set its depth so the canopy is snug.
-
Connect the ground first
- Bond the fixture ground to the box ground screw and the house ground.
- On metal boxes, add a short ground pigtail to the green screw on the bracket.
- Good grounds make metal parts safe to touch.
-
Connect neutral to neutral
- White from fixture to white from house.
- Twist clockwise, cap with a wirenut, and do a firm tug test.
- Push-in connectors also work well and are fast.
-
Connect hot to hot
- Black (or blue on some fixtures) to the house hot.
- Cap and tug test again.
- If a dimmer is on the wall, confirm it is LED compatible.
- Tuck wires neatly
- Fold wires into the box in gentle loops.
- Keep the ground wire away from the hot terminal screws.
- Mount the fixture
- Lift and align with the bracket.
- Install canopy screws and snug them up evenly.
- Do not crush wires.
- Install bulbs and shades
- Use the bulb type and wattage on the fixture label.
- For LED, pick a warm color for cozy rooms and daylight for work zones.
- Restore power and test
- Turn on the breaker.
- Test the switch and any dimmer from low to high.
- If it flickers, swap bulbs or the dimmer for a compatible pair.
- Final checks
- The canopy should be tight and flush.
- No wobble. No exposed copper. No buzzing.
When you understand how to install a light fixture, this routine becomes second nature. Plan your moves, test twice, and finish clean.

Special Situations and Pro Tips
Some homes need extra care when you plan how to install a light fixture.
-
Heavy chandeliers
Use a brace rated for lighting loads. Assemble crystals after mounting. Tie a temporary hook or use a second person to avoid strain on wires. -
Plaster ceilings
Pre-drill pilot holes for screws. Use a box extender if the box is recessed. Go slow to prevent cracks. -
Shallow or crowded boxes
Use compact connectors. Keep all splices within the box. Never hide splices in the ceiling. -
Sloped ceilings
Use a swivel or sloped-ceiling adapter so the canopy sits flat. Many pendants include this feature. -
No ground in older homes
Bond metal parts to the metal box only if the box is grounded. If not, run a ground or use a Class II (double-insulated) fixture as allowed by local code. A licensed electrician can assess the safest path. -
Aluminum wiring
Stop and call a pro. Use approved connectors, such as specific Al/Cu couplers, to prevent overheating. -
Dimmer and LED pairing
Match dimmers with the bulb’s compatibility list. This single step fixes most flicker and buzzing.
These small choices make how to install a light fixture smoother, safer, and better looking.
Troubleshooting and Common Mistakes
A few fast checks solve most issues after you finish how to install a light fixture.
Common problems and fixes:
-
Light flickers
Loose wirenut, poor bulb-dimmer match, or shared neutral issues. Tighten connections and swap to listed, dimmable LEDs. -
Breaker trips
Hot and neutral may be crossed or a screw is shorting to the box. Kill power, inspect, and redo the connections. -
Switch does nothing
The hot may be tied to the neutral bundle by mistake. Reconnect black to switch leg hot, white to neutral. -
Buzzing sound
Often a dimmer-bulb mismatch or over-wattage lamp. Use bulbs within the fixture’s label and a compatible dimmer. -
Canopy gap or wobble
Bracket depth is off or screws are uneven. Re-seat the bracket and tighten evenly.
Avoid backstabbing conductors into devices nearby. Use side screws or proper connectors. A clean box and firm tug tests prevent 90% of callbacks in my experience.
Maintenance, Upgrades, and Cost
Once you know how to install a light fixture, keeping it in top shape is easy.
- Dust shades and lenses to keep light output high.
- Check screws once a year for snug fit.
- Swap to high-quality, dimmable LEDs for long life and stable dimming.
Smart upgrades:
- Add a dimmer for mood and savings.
- Choose motion sensors in halls or closets.
- Use color-selectable LED fixtures to tune warmth per room.
Typical costs:
- Basic fixtures: 20 to 150 dollars. Designer or chandeliers: 200 dollars and up.
- DIY supplies: 10 to 30 dollars for connectors and small parts.
- Pro labor: often 100 to 300 dollars per visit, depending on region and complexity.
Knowing how to install a light fixture lets you save on labor and put more of your budget into style and quality.

Frequently Asked Questions of How to Install a Light Fixture
Do I need to turn off the breaker or is the switch enough?
Always turn off the breaker. A switch may not cut power to all wires in the box, and neutrals can still be live relative to ground.
What if my ceiling box is loose or not rated for my fixture?
Replace it with a properly rated box or add a support brace. A solid mount is key for safety, code, and a flush canopy.
Can I install a light fixture where a ceiling fan used to be?
Yes, but confirm the box is rated for the new fixture. Remove any extra fan hardware and use the fixture’s bracket for a clean mount.
Why does my new LED light flicker on a dimmer?
It is usually a dimmer and bulb mismatch. Use dimmable bulbs and a listed compatible dimmer to fix it.
How do I connect the ground wire if my old box has none?
If there is no ground in the cable or box, consult a pro to run a ground or assess options. In some cases, a double-insulated fixture may be allowed by local code.
Can I mix push-in connectors and wirenuts?
Yes, if they are listed for the wire size and material. Keep splices neat and inside the box with a firm tug test.
How long does it take to install a light fixture?
Most swaps take 20 to 45 minutes. New installs or heavy fixtures may take longer due to support and wiring needs.
Conclusion
You now know how to install a light fixture with safe prep, clear steps, and pro-level checks. Turn off power, confirm every wire, make tight connections, and mount with solid support. Pair the right dimmer and bulbs, and you will enjoy steady light and a clean finish.
If you are ready, pick a room and try one fixture today. Want more help? Ask a question, subscribe for project guides, or share a photo of your setup so we can troubleshoot together.